
How to TV Wall Mount Installation Right
- Brandon Bird
- 13 minutes ago
- 6 min read
A crooked TV changes the whole room - and not in a good way. If you are searching for how to TV wall mount installation, you are probably trying to avoid three things at once: wall damage, a bad viewing angle, and the headache of realizing halfway through that the bracket does not line up with your studs.
Mounted correctly, a TV looks cleaner, frees up floor space, and makes the room feel more finished. But the job is less about putting a screen on the wall and more about getting the details right before the first hole is drilled. The wall type, the stud location, the bracket style, and even where the power outlet sits all affect the result.
How to TV Wall Mount Installation Starts
The first decision is not the mount. It is the location. Homeowners often pick the wall that looks best from the doorway, then realize later that sunlight hits the screen every afternoon or the couch sits too close for comfortable viewing. A good setup balances appearance with everyday use.
The center of the screen should usually sit close to eye level when you are seated. That can shift a little in a bedroom, above a fireplace, or in a bonus room where people recline more often. Still, mounting too high is one of the most common mistakes because it looks dramatic at first and feels uncomfortable after a week.
You also want to think through the room around the TV. If there is a soundbar, gaming console, or media cabinet involved, the mount height needs to work with those items too. This is where a little planning saves a lot of patching later.
Choose the Right Mount Type
Not every bracket solves the same problem. A fixed mount keeps the TV close to the wall and gives the cleanest look. A tilting mount helps reduce glare or improve the view when the TV sits slightly higher. A full-motion mount offers the most flexibility, but it places more stress on the wall and needs especially solid installation.
That trade-off matters. If you want the TV to swing toward a kitchen or angle toward a sectional, full-motion may be worth it. If you mainly want a neat, low-profile look in a living room, a fixed or tilt mount is often the better choice.
Check TV and Bracket Compatibility
Before anything else, confirm the mount matches your TV size, weight, and VESA pattern. That means the hole pattern on the back of the TV has to line up with the mounting arms. A bracket that says it fits a wide range of screen sizes still has to match your exact TV specs.
This is also the moment to verify hardware. Some TVs require spacers or different bolt lengths, and using the wrong screws can damage the set. If the hardware kit gives you options, do not guess. Match them carefully to the manufacturer guidance.
What You Need Before Mounting
For most standard installations, you will need a stud finder, drill, level, tape measure, socket wrench, pencil, and the correct mounting hardware. A second person is not optional once the TV is ready to lift. Even a mid-size TV is awkward to hold steady while you engage it on the bracket.
A simple check of the wall matters too. Drywall over wood studs is the most common and straightforward setup. Brick, concrete, metal studs, plaster, and stone surfaces change the process and may require different anchors, tools, or a different mounting plan altogether. If you are not sure what is behind the wall, slow down there.
Find the Studs Before You Mark Anything
If there is one part of how to TV wall mount installation that cannot be rushed, it is stud location. Most TV mounts need to be secured into studs, not just drywall. Drywall anchors alone are not enough for a typical television, especially with a tilting or full-motion bracket.
Use a stud finder, then verify the edges of each stud so you can mark the center. It helps to check for a consistent spacing pattern and confirm your results with a small pilot hole if needed. A lot of bad installs happen because someone trusted a single stud finder pass and drilled based on a false reading.
Once the stud centers are marked, hold the wall plate in place and see whether the location still works for the room. Sometimes the ideal visual center and the stud layout do not perfectly match. In that case, you may need to shift the TV slightly, choose a different mount with more horizontal adjustment, or rethink the wall position.
Measure for Height, Centering, and Clearance
At this stage, measure more than once. The bracket position determines where the TV will actually land, and that is not always obvious from the wall plate alone. Mounting arms, hook positions, and bracket offsets can move the screen a few inches higher or lower than expected.
It is smart to tape out the approximate TV size on the wall before drilling. That quick visual check helps you catch issues with furniture clearance, outlet placement, and nearby windows or decor. It also makes it easier to picture whether the final height feels natural from your main seating area.
If you want hidden wires, plan that now. Cable management can be as simple as a paintable surface raceway or as polished as running wires behind the wall where code and room conditions allow. The cleaner look is worth thinking through early because cable routing often affects the exact mount location.
Drilling and Securing the Mount
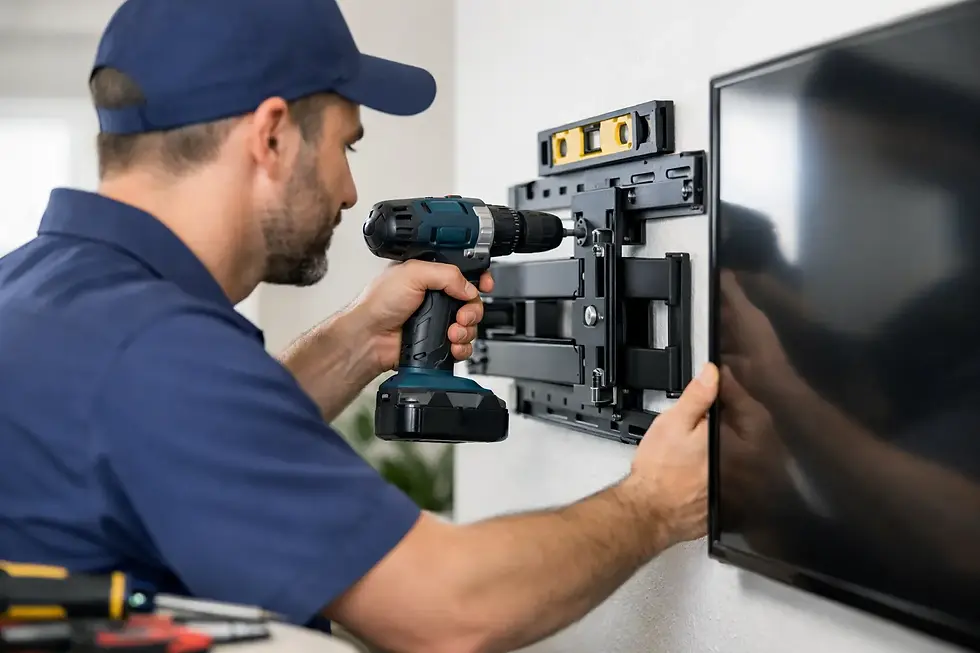
After you confirm stud locations and bracket placement, mark the drill points carefully and use a level before making pilot holes. Pilot holes help keep lag bolts centered and reduce the risk of splitting wood studs. Once the wall plate is up, tighten each lag bolt firmly, but do not overtighten to the point that you strip the wood or crush the drywall.
A level check matters here too. Many homeowners assume the mount is straight because the plate looked level at one point during installation. Check it again after tightening. A small shift during fastening can leave the TV visibly off.
With a full-motion mount, pay close attention to the manufacturer's spacing and bolt requirements. Those brackets create more leverage as the arm extends, so solid attachment is even more important than with a flush mount.
Attaching the TV Safely
Once the wall plate is secure, attach the mounting arms or brackets to the back of the TV using the correct screws and spacers. Keep pressure even and avoid overtightening. Then, with one person on each side, lift the TV into place and lock it onto the wall plate according to the bracket design.
Do not stop as soon as the TV is hanging. Engage any safety clips, locking screws, or retaining tabs that keep the TV from lifting off the mount. This step gets skipped more often than it should, especially when people are eager to move on to the final look.
Before calling the job done, test stability gently. The TV should feel secure, not loose or wobbly. If the mount tilts or articulates, move it through its intended range and make sure nothing binds, sags, or pulls at the wall.
Common Problems During TV Wall Mount Installation
The most common issue is hitting the right height but missing the right structure. A TV can look centered on the wall and still be mounted poorly if the fasteners are not anchored where they should be. The next common problem is cable planning. Homeowners often get the screen mounted and only then realize cords hang visibly below it or the outlet sits in the wrong spot.
Another frequent issue is using the wrong bracket for the room. Full-motion sounds appealing, but if you never plan to move the TV, it adds cost, depth, and installation complexity without much benefit. On the other hand, a fixed bracket can be frustrating if you need easier access to cables later.
Then there is the fireplace question. Mounting above a fireplace can work, but it depends on height, heat, and viewing comfort. If the screen ends up too high or too close to rising heat, the clean look may not be worth the compromise.
When It Makes Sense to Call a Pro
Some installations are straightforward. Others look simple until you get into off-center studs, masonry walls, over-the-fireplace layouts, soundbar integration, or cable concealment. That is usually the point where professional help saves time and prevents extra wall repair.
For homeowners in Charlotte and nearby communities, working with a local service company can be especially helpful when you want a clean finish without turning a one-hour project into an all-day one. Bird Home Services handles TV mounting with the kind of practical focus most homeowners want - secure installation, tidy results, and no guesswork about whether the wall can truly support the setup.
A well-mounted TV should disappear into the room in the best way. It feels natural, looks clean, and works every day without drawing attention to the effort it took to get there.


Comments